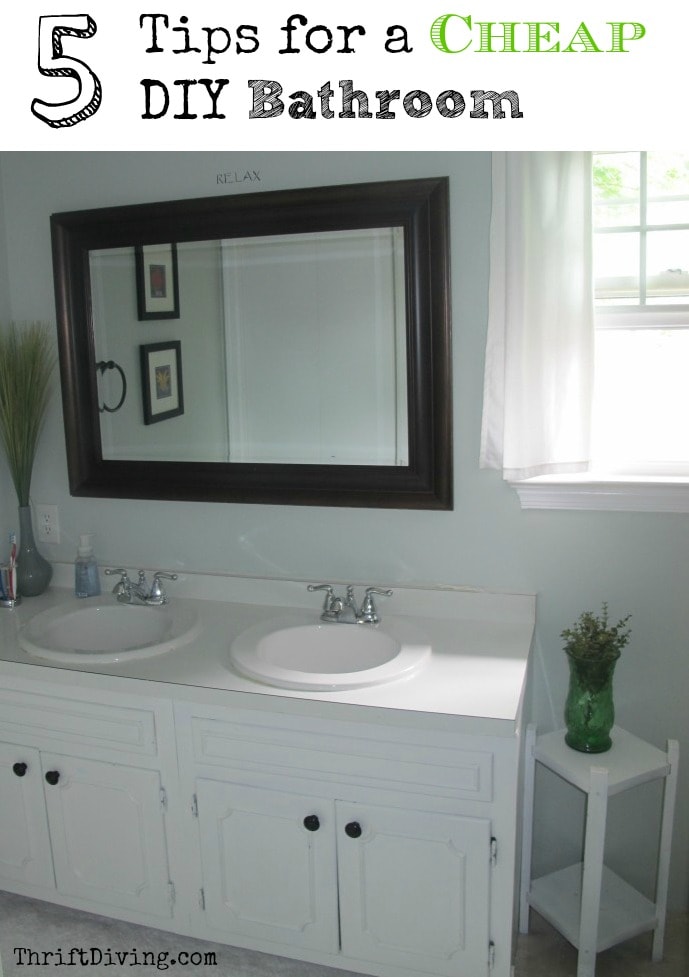
5 Tips for a Cheap DIY Bathroom
I’m a little envious of all you people who have gorgeous new bathrooms. You know–the newly renovated or newly built homes that come with that big ‘ole jacuzzi tub that you never use but sure are glad you have “just in case” you ever want to hop in. You don’t have stale wallpaper. Oh–and your floor is ceramic or marble instead of crusty ‘ole peel n’ sticks vinyl.
The rest of us have to use tips like these to transform our bathrooms on a budget:
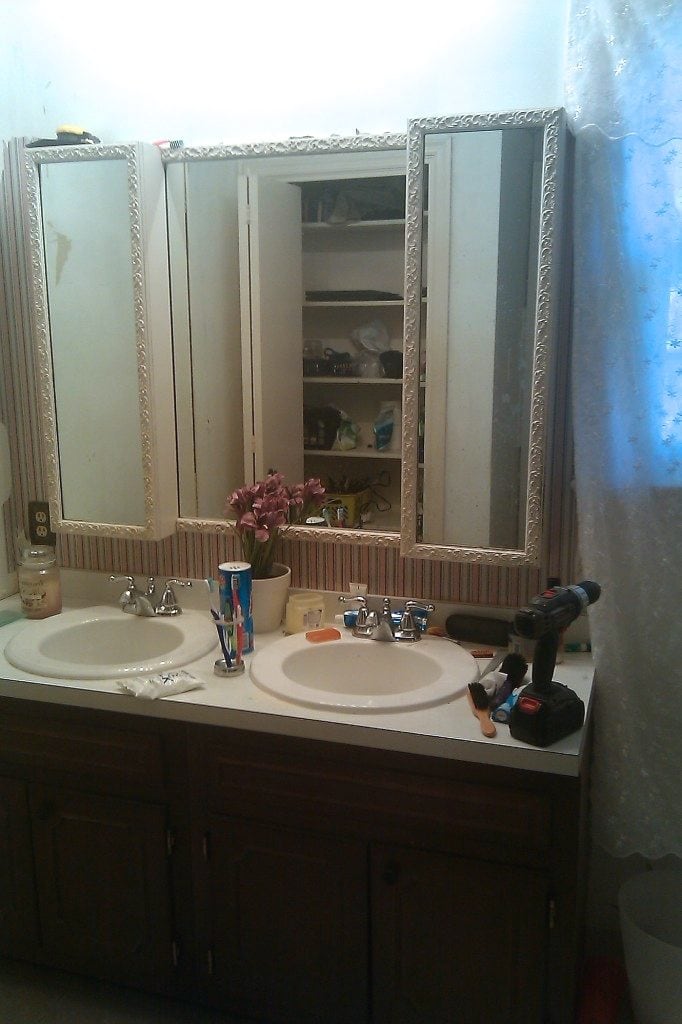
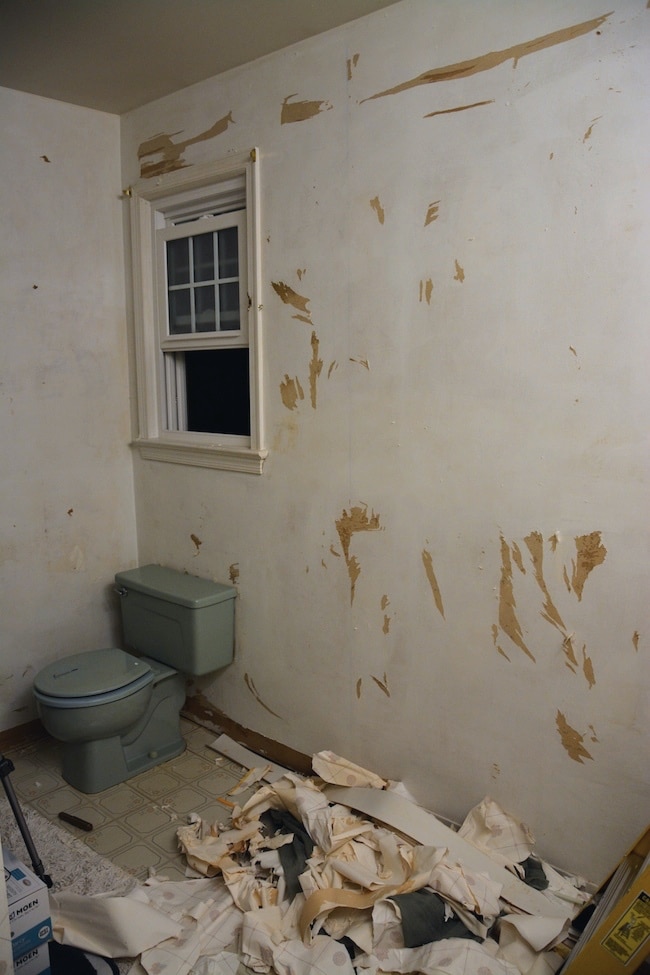
Now……This is what my bathroom used to look like!
I know….I still can’t believe it, either!!
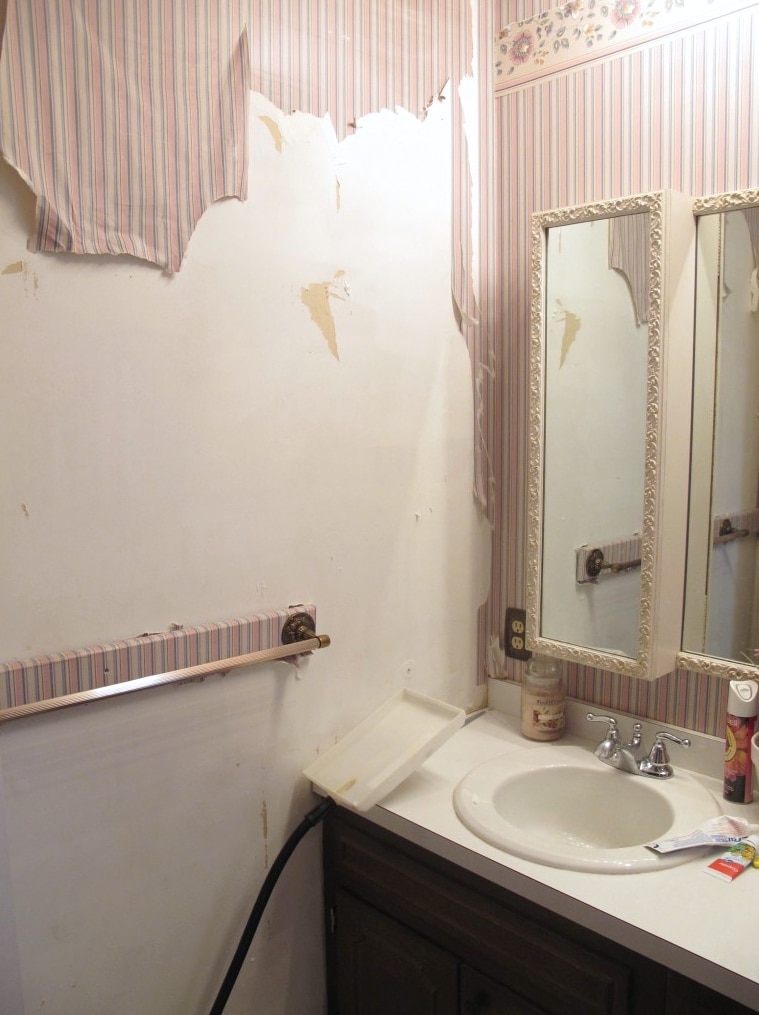
Horrific, wasn’t it??
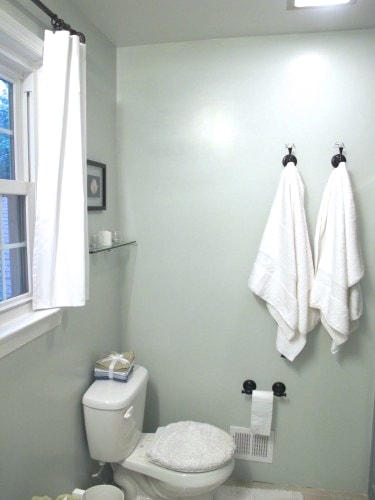
I still think wallpaper should be banned. It’s a you-know-what to remove. But this pretty shade of Sherwin Williams Sea Salt paint was worth the trouble!

Before DIY’ing it, I’m embarrassed to say that we lived with a doily shower curtain up at the window for at least 6 months.
I know–total ghetto fabulous.

But after a lot of hard work, the result was astounding.
If you’ve got a bathroom that needs a lot of work and is outdated, here are some thrifty tips to help you transform it on a budget!
5 Tips for a Cheap DIY Bathroom
TIP #1 Embrace Your Eye Sore!
So someone mentioned recently that they had PINK TILE in their bathroom when they moved in. YIKES. Do you also have an eye sore in your bathroom? For me, it was this turquoise shower. See it over there, with the outdated brassy door??
Now, in a recent post, I told you that I wish everything in my house could be turquoise. True enough. But my SHOWER?? Um, yeah, that’s a bit much. However,when we moved in, that’s what was here. And we don’t have tons of money yet to rip it out and install a new shower.
The solution? Decorated around your eye sore.
I simply love Sherwin Williams Sea Salt, but thankfully, it also compliments the “who-in-the-world-chooses-a-turquoise-shower-stall” shower stall. Now it’s no longer an eye sore. 🙂
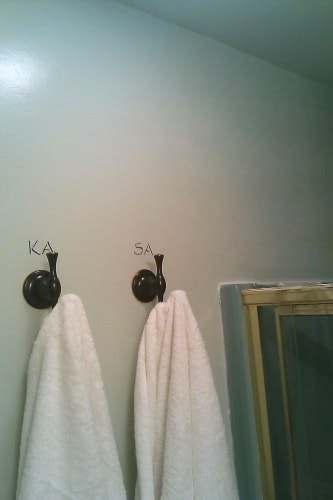
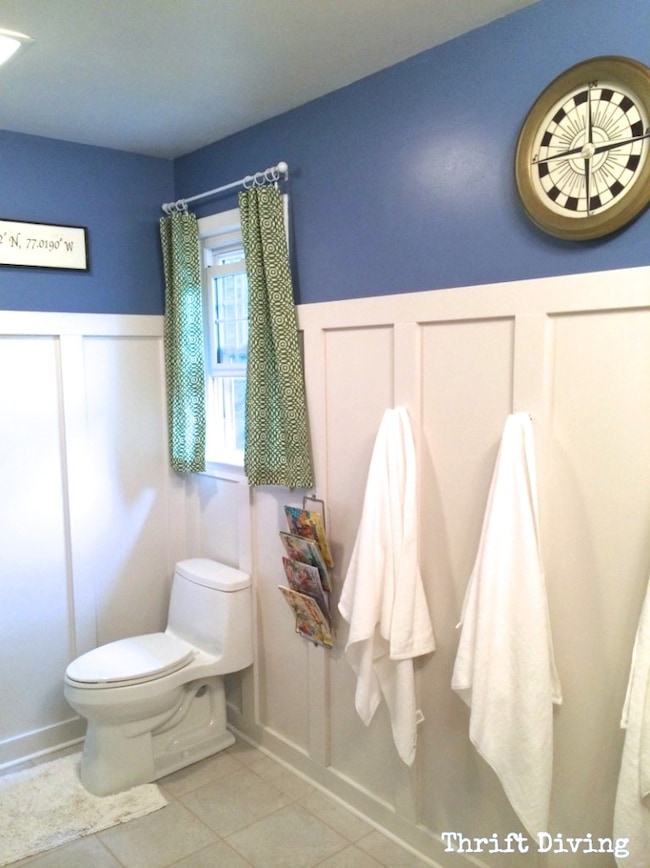
TIP# 2 Just because it SAYS it’s a robe hook…….
…doesn’t mean you have to hang your robes on it. Have you seen the price of decent towel bars?! Expensive. So grab some cute robe hooks and toss your towels on it instead. Trust me, they rarely fall off. And for, like $12, you’ve got something cute to hang your towels from instead of paying double or triple for a towel bar.

![]()
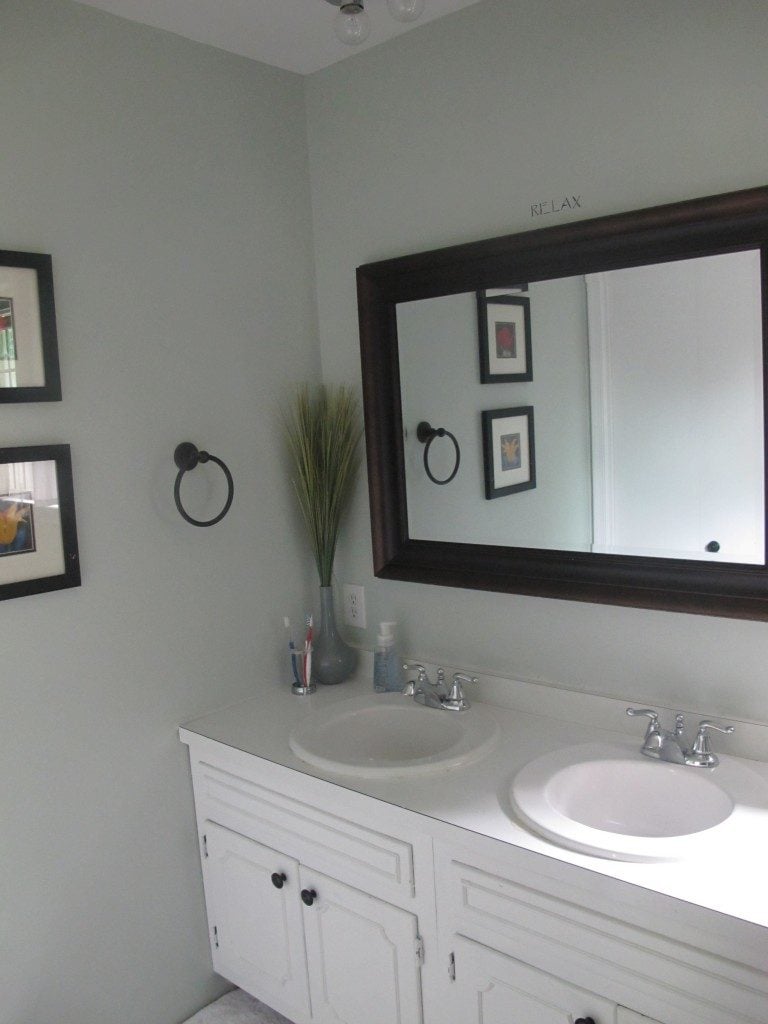
TIP #3 Unleash your inner photographer.
This is seriously one of the cheapest ideas. First, let me say that I’m terrible about decorating my walls. If you were to come over to my house, you would see huge blank walls of nothing. I take tons of pics but rarely do they end up getting printed.
Don’t be like me 🙂
Go take some amazing pictures of flowers or landscapes (read my 10 tips for creating awesome wall art) , or whatever floats your boat, and then print them. Pick up some cheap frames from the thrift store. And then grace your walls with all your awesome shots!
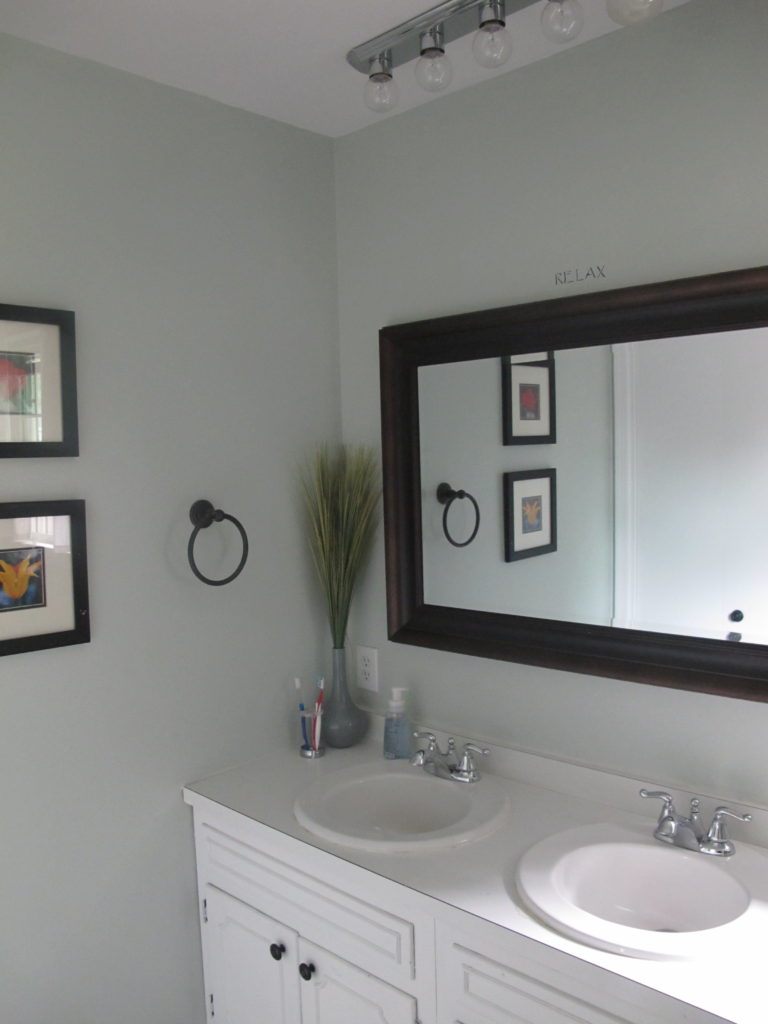
Those 2 pics to the left?? Yep, I took them myself and framed them. Like 10 years ago. And I’m still rockin’ ’em…. 🙂
If you read my post 10 Tips to Create Awesome DIY Floral Art, you’ll be able to take some really awesome shots to get framed. Here’s one I took recently and plan to blow up. If you take shots like these, bathroom wall art would be super cheap.

TIP#4 Get it all covered!
If you have ugly peel-and-stick tiles like me, but can’t afford to upgrade to tile yet, you’ve got to find a way to deal with whatcha got. Rugs will be your best friend. The more you can cover up, the better! And be sure to choose rugs that don’t contrast with your floor. Get something that blends in so that when people walk in, they don’t turn away disgusted. LOL
This plush rug I got from Home Goods covers up half of the little floor on this side. I chose white because it blended best.

But if you have the money, I whole-heartedly recommend SnapStone flooring to cover old vinyl tile. It’s a real porcelain tile that has a rubber tray on the back that allows you to go right over your old vinyl flooring. I’m pretty sure the two layers of vinyl I have here has some asbestos. Instead of removing it, which could be more expensive to hire a professional to do, I just tiled over it with SnapStone (see my kids’ bathroom makeover to see how it’s done). I’ll be posting on my YouTube channel soon a full-tutorial on how to install SnapStone flooring to cover a vinyl floor, so don’t forget to subscribe so you don’t miss when that video comes out soon.
But regarding cost, SnapStone can be expensive. If you have the budget, go for it. If not, stick with rugs until you’ve saved up money for it.
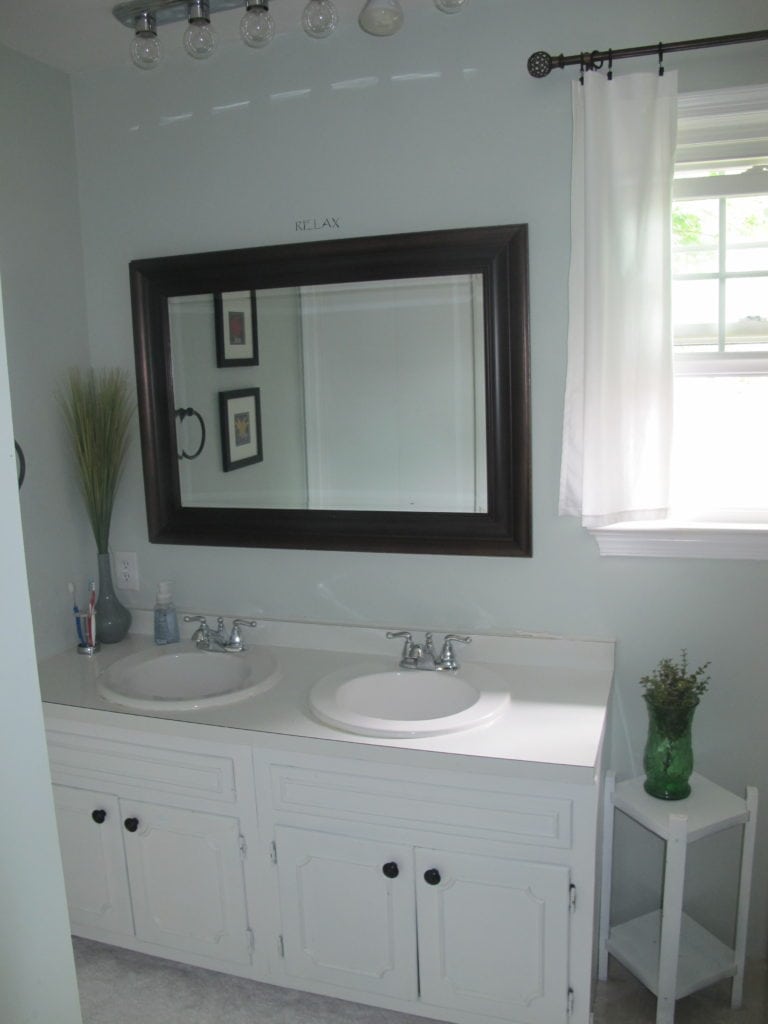
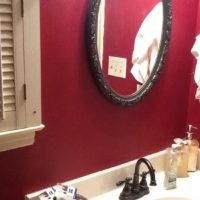
TIP #5 If you only did one thing in your bathroom, do this:
You see this mirror? Okay, some of you that really love vintage things may “ooh” and “ahh” over it, but I had another reaction that was more along the lines of doubling over and holding my stomach. LOL
My real estate agent/friend gave me THE best tip for cheaply sprucing up any bathroom.
And that is: change out the mirror.
I went to Home Goods and chose a mirror for $60 that traditionally goes in the living room or something, and put it up in the bathroom. It was a WORLD of difference! Doing that, with fresh white paint on the vanity (which didn’t get changed out), and it looks like a whole new bathroom!
The Bottom Line
This bathroom makeover only cost just under $200 for all the supplies/materials. Just paint…..decorating around your eye sore……and covering up the old floors can make a world of difference. Just think outside the box a little 🙂
If you want to read more about some of the other crazy work that I had to do in this bathroom, you can see the original post here.
I Also Made Over My Kids’ Bathroom!
Since doing my master bathroom, I have did my kids’ bathroom makeover on a budget. You won’t believe the before and after!
BEFORE
AFTER!
See My Readers’ Bathroom Makeovers
Here at Thrift Diving, my readers and I have done room challenges and have made over even more bathrooms. Check them out!

Join the Next 30-Day Room Challenge
Do you have an outdated bathroom that you are struggling with? Considering joining my 30-Day Room Makeover Challenge (it’s free), where my readers and I band together and tackle one room in our house in 30 days. If your bathroom is a rat hole, now’s the time to do something about it :). LOL

Download the 5 freebies!

Thrift Diving inspires women to decorate, improve, and maintain their home themselves...using paint, power tools, and thrift stores! Use these 5 printables, checklists, and ebooks to get started!


This is a wonderful post. The difference in painting the cabinet base/adding a new mirror is amazing! Great job!!!
Yeah! It’s amazing how much different your bathroom can look with an inexpensive mirror and some paint on old structures! 🙂 Thanks for commenting!!
What a transformation!!! I love how it turned out!! AWESOME job!!!
Thank you so much, Angela!!
Hey Girly! Lot’s of improvement for not a lotta moolah! Great Job!!! I loved meeting you at Haven thanks for doing the link up to the posts on the Haven page! I’m going to check out that SW color in my color deck when I drag my butt off the bed!
Hey, Brandie! Yeah, I’m loving the Haven threads! It’s a lot of fun! You’ll love the SW color. It changes depending on the light….blue one second….greenish the next. Love it!
you did a “bee-u-tee-full” job on that bathroom! I like the idea of your darker wood mirror frame with the white vanity! it looks fresh, clean and new! good job! paint in gorgeous!
Karen, that was totally not a design decision that I made knowingly, but it works!! 🙂 I always love when that kind of “blind design” happens! LOL Thanks for commenting!
Great job! You already figured out the number 1 cheap diy update….paint! It is the first thing I think of when I am ready to update a room. I have lots of room updates on my blog if you want to check them out, but they all start with paint. And I was stuck with peel and stick tiles too but I covered them with much nicer peel and stick tiles. I didn’t do it because I didn’t know that you could but on Addicted to decorating’s blog, she actually grouted between peel and stick tiles! It looked awesome. The other cheap update trick I ALWAYS use is thriftstore decorating, but you already do that too. You did a great job!
Now that’s a great idea: “tiling” over peel and stick! That’s a way to think outside the box! Thanks for sharing that tip. I may have to do that in a couple rooms that we are no where NEAR thinking about putting in tons of money to renovate yet! Thanks for that!!! 🙂 And for commenting, of course 😉
I could never get away with white paint with my messy boys. It looks great!
Oooh, but I don’t, either! They get their grubby little hands all over it! LOL
A little bit of paint went a long way in my bathroom: http://parentingpatch.com/simple-and-quick-bathroom-makeover-ideas-frugal-frida/
Heather, that floor is amazing! It’s so geometrical and unique!
Great before and afters! It looks beautiful!
Hey girl! Thanks so much. I see you doing your ‘thang in your kitchen! I can’t believe you’re rebuilding the whole thing. That’s amazing, really!
Absolutely gorgeous Serena!! You did a fabulous job!
BTW, this is one of your roomies from 2012 BlogHer 😉 You’ve come a long way baby!!
I wish you’d publish some of your poetry too **nudge nudge**
Kimberly!! Hey!!! Girl, it’s been a while! How are you?? Did you attend BlogHer ’13? I complained a little about it, but it really was a great experience! I’m doing my best to push this little engine that could called a “blog.” LOL. How’s your blogging coming along?
Your bathroom turned out beautiful. I wish that mine was that big enough for double sinks. I’m with you, there are many things that you can do to update your home without breaking the bank. You’ve done a marvelous job on yours, Bravo!!!
Hey there, Connie! The double sink thing is pretty awesome, especially when you’ve got a family of 5, like mine! The downside is that you’ve got more sink to clean! UGH! 🙂 Thank you for the compliments! And you rock for leaving a comment. Thank you!